


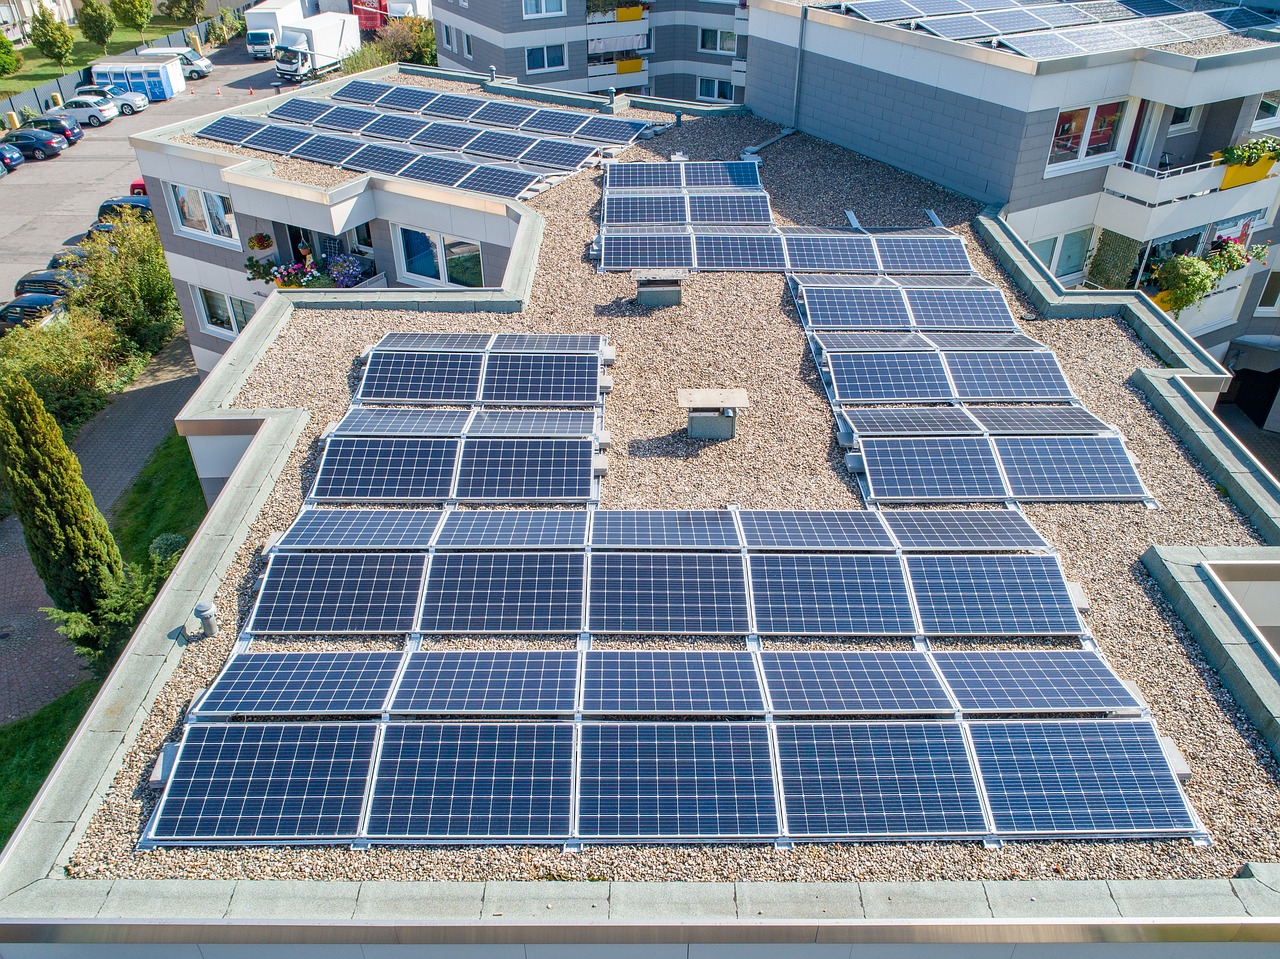
Thinking about going solar? Installing a solar power system can be one of the smartest investments you make for your home and the environment. With rising energy costs and increasing awareness of climate change, harnessing the sun’s energy not only reduces your electricity bills but also contributes to a sustainable future.
You might wonder where to begin. From understanding the different types of solar panels to navigating local regulations, the installation process can seem daunting. But with the right guidance, you can simplify each step and make informed decisions that suit your needs.
In this article, you’ll discover everything you need to know about installing a solar power system, including tips for selecting the right equipment, finding reliable contractors, and maximizing your investment. Let’s dive into the world of solar energy and unlock its benefits for your home.
Understanding Solar Power Systems
Solar power systems convert sunlight into electricity for residential or commercial use. These systems consist of several components that work together to produce clean energy, reducing reliance on traditional power sources.
What Is a Solar Power System?
A solar power system primarily includes solar panels, an inverter, a mounting structure, and sometimes energy storage solutions. Solar panels capture sunlight and convert it into direct current (DC) electricity. Inverters change this DC electricity into alternating current (AC), which powers appliances. Mounting structures hold the panels in place, typically on rooftops or ground installations. If included, energy storage like batteries store excess energy for later use, especially during low sunlight hours.
Systems vary based on energy needs. A grid-tied system connects to the electrical grid, allowing surplus energy to feed back into it. An off-grid system operates independently, providing energy in remote locations without utility access. Understanding these components is essential for making informed installation decisions.
Benefits of Installing a Solar Power System
Installing a solar power system offers numerous advantages. Financial savings occur through lower electricity bills and potential incentives like tax credits or rebates. Many homeowners see a significant reduction in energy costs after installation.
Environmental impact remains another key benefit. Solar power generates electricity without harmful emissions, helping to decrease carbon footprints. Switching to solar energy promotes cleaner air and conserves natural resources.
Energy independence allows you to reduce reliance on the grid, protecting against fluctuating energy prices. Homeowners may experience greater control over their energy sources. Additionally, installing solar can increase property value, making homes more attractive to future buyers. Overall, these factors underscore the importance of considering solar power for residential energy needs.
Planning Your Solar Power System Installation
Planning your solar power system installation involves careful consideration of your energy needs and property characteristics. These steps ensure an efficient and effective transition to solar energy.
Assessing Your Energy Needs
Assessing your energy needs is essential for determining the right size of your solar power system. Start by reviewing your electricity bills from the past 12 months. Calculate the total energy usage in kilowatt-hours (kWh) to get an accurate picture of your consumption.
Next, identify peak usage hours when energy consumption is highest. This information helps in sizing the solar array effectively. Consider any changes in your lifestyle or potential future renovations that may impact energy needs. For example, adding appliances increases energy consumption.
Consult with a solar professional for an energy audit to assess your current usage and estimate potential savings. Accounting for factors such as energy-efficient appliances and weather changes also helps in your assessment. Understanding your energy requirements sets the foundation for selecting the appropriate solar system components.
Evaluating Your Property
Evaluating your property requires analyzing several important factors that affect solar panel installation. Start by examining the roof’s orientation and tilt. South-facing roofs generally receive the most sunlight, maximizing energy production. Roof angles should ideally be between 15 and 40 degrees.
Check for potential shading from trees or nearby buildings, as this can reduce the system’s efficiency. Identify any trees that may require trimming to optimize sunlight exposure.
Assess the structural integrity of your roof. Ensure it can support the weight of the solar panels and is in good condition. A professional inspection may be necessary before installation.
Finally, review local zoning laws and homeowners’ association (HOA) guidelines. These regulations can influence panel placement and design. Understanding these factors leads to a more efficient and compliant installation.
Materials Needed for Installation
When installing a solar power system, having the right materials is essential for a successful setup. Here’s a breakdown of the key components needed.
Solar Panels
Solar panels serve as the primary device for converting sunlight into electricity. Select high-efficiency solar panels that suit your energy needs. Panels come in various types like monocrystalline, polycrystalline, and thin-film. Monocrystalline panels often provide higher efficiency and space use while polycrystalline ones are usually more affordable. Thin-film panels might require more space but are flexible and lightweight. Make sure to consider the warranty duration and manufacturer reputation. Typically, solar panels have a 25-year warranty. Expect a range of output from 250 to 400 watts per panel, depending on the type and manufacturer.
Inverter
The inverter is a crucial part of the solar system that converts direct current (DC) from the solar panels into alternating current (AC) for home use. Choose a reliable inverter that matches your solar panel output. There are string inverters, microinverters, and power optimizers available. String inverters are best for systems with uniform sunlight exposure. Microinverters serve well when shading issues are present. Pay attention to inverter efficiency ratings, generally ranging from 95% to 98%. The lifespan of most inverters is about 5 to 15 years, so consider extending warranties if planning a long-term investment.
Mounting Equipment
Mounting equipment ensures solar panels remain secure on your roof or ground. Select strong mounting systems that suit your installation type. Roof mounts, ground mounts, and pole mounts are common options. Roof mounts attach directly to your roof structure, requiring waterproofing measures. Ground mounts offer flexibility and suitability for larger installations. Pole mounts elevate panels to access higher sun exposure, reducing shading from nearby structures. Verify that the mounting equipment can withstand wind and other environmental factors, especially in areas with high winds or severe weather.
Batteries (If Off-Grid)
Batteries store excess energy generated by your solar panels. Consider high-capacity batteries for off-grid systems that ensure consistent power availability. Common battery types include lead-acid and lithium-ion. Lead-acid batteries are more affordable but have shorter lifespans and lower efficiency. Lithium-ion batteries provide longer life, higher efficiency, and reduced maintenance. Calculate your energy storage needs by considering total energy usage and peak demands. Look for battery systems with a depth of discharge (DoD) rating of at least 80% to maximize usable capacity.
Wiring and Electrical Components
Wiring and electrical components are vital for connecting the solar system to your home. Ensure high-quality wiring that matches your system’s energy capacity. Use solar-rated cables to resist weather and UV damage. Standard wire gauges for solar installations range from 10 AWG to 12 AWG, depending on system size and distance between components. Additionally, include components like circuit breakers, fuses, and junction boxes to enhance safety. Grounding equipment is crucial for preventing electrical issues and ensuring proper operation. Always follow local electrical codes when installing wiring and electrical components.
Tools Required for Installation
Installing a solar power system involves various tools that contribute to a successful setup. Below outlines essential categories of tools that ensure a smooth process.
Basic Hand Tools
Using Basic Hand Tools simplifies installation tasks. Gather the following items to complete the setup:
- Screwdrivers: Philips and flathead screwdrivers are essential for securing panels and components.
- Wrenches: Adjustable wrenches help tighten bolts on mounting brackets and racking.
- Pliers: Needle-nose pliers assist in handling wires and connectors.
- Tape Measure: Accurate measurements are crucial for spacing panels and components.
- Level: A level ensures proper alignment of solar panels and prevents slippage.
- Utility Knife: Good for cutting through various materials like wire ties and insulation.
Collecting these basic hand tools can streamline the installation and promote efficiency.
Power Tools
In addition to hand tools, certain Power Tools are invaluable for the installation process. Consider using:
- Drill: A cordless drill with drill bits is vital for preparing mounting holes and securing brackets.
- Impact Driver: This helps drive screws quickly and is especially useful for larger lag screws.
- Saw: A reciprocating saw or jigsaw may be necessary for cutting mounting rails or modifying panel shapes.
- Wire Stripper: A quality wire stripper speeds up the process of preparing electrical connections.
- Multimeter: This tool is crucial for testing the system’s electrical output and ensuring proper functionality.
Employing these power tools results in faster installation and improved precision.
Safety Gear
Prioritizing Safety Gear protects you throughout the installation. Equip yourself with the following items:
- Safety Glasses: Protect your eyes from debris and while working with tools.
- Gloves: Durable gloves ensure hand safety when handling materials, wires, and sharp edges.
- Hard Hat: Wear a hard hat to guard against falling objects, especially on rooftops.
- Harness: A safety harness is essential for working on roofs or elevated structures to prevent falls.
- Non-slip Shoes: Use sturdy, non-slip shoes for stability during installation on various surfaces.
Implementing safety gear minimizes injuries and enhances the overall installation experience.
Installing Mounting Hardware
Properly installing mounting hardware ensures the stability and longevity of your solar power system. Follow these steps for effective installation:
Select Mounting Location
Choose a site that receives maximum sunlight throughout the day. Aim for an unobstructed area free from shading by trees, buildings, or other structures.
Gather Necessary Tools
Use approved tools such as a drill, socket set, wrench, level, and tape measure. These tools simplify the installation and ensure accuracy.
Install Mounting Rails
Align mounting rails along your chosen location. Secure them to roof trusses using lag bolts, making sure they are parallel. Place a level on the rails to confirm they are straight.
Use Flashing Kits
Apply flashing kits where rails meet the roof to prevent water leaks. Position the flashing under and over the rails, securing them firmly.
Position Solar Panels
Place solar panels onto installed mounting rails. Use clamps to hold the panels securely. Ensure each panel is aligned for optimal solar capture.
Tighten Fasteners
Tighten all fasteners using a torque wrench. Follow manufacturer specifications to prevent damage to the panels or mounting system.
Connect Wiring
Route wiring through conduits attached to the mounting hardware. Ensure that wiring connections are safe and protected from exposure to elements.
Final Inspection
Perform a final inspection of all mounting hardware and connections. Check for any loose fittings or potential issues before proceeding with system power-up.
Document Installation
Keep a record of the installation process, including photos of the hardware and wiring. This documentation assists with future maintenance and inspections.
By following these steps for installing mounting hardware, you set a solid foundation for a successful solar power system installation.
Attaching Solar Panels
Attaching solar panels represents a critical phase in the solar power system installation process. Follow these steps to secure and position your solar panels effectively.
Position the Solar Panels
Position the solar panels on the mounting structure according to your planned layout. Aim for the panels to align with the sun’s path for optimal energy collection. Ensure panels face south in the northern hemisphere and north in the southern hemisphere.
Secure Each Panel
Secure each solar panel to the mounting rails using the provided brackets and fasteners. Align brackets with the pre-drilled holes on the panels for a snug and secure fit. Tighten all fasteners securely to prevent movement during wind or heavy weather conditions.
Make Electrical Connections
Make the necessary electrical connections using the wiring harnesses provided. Connect the positive and negative leads from the panels to the corresponding leads on the inverter, ensuring proper polarity. Use connectors rated for outdoor use to guarantee long-lasting performance.
Install Microinverters (Optional)
If using microinverters, attach them to the back of each panel before securing the panels to the mount. Connect the inverter wires to the main electrical system as per the manufacturer’s instructions. This configuration optimizes energy production for each panel independently.
Seal the Installation
Apply a sealant around any holes or mounts to prevent water intrusion. This step is vital in ensuring the longevity of the solar power system. Inspect every installation point for potential leaks and seal as necessary.
Test the System
Once all connections are in place, test the system. Power on the inverter and monitor the output readings. Ensure that all panels are producing electricity effectively. If you notice any panels underperforming, double-check the connections and panel alignment.
Inspect for Safety
Conduct a final inspection of the entire installation. Ensure all wires are secured and free from obstruction. Verify that the mounting system is stable and capable of holding the panels in place over time.
Document the Installation
Document the installation process, including panel orientation, electrical connections, and any unique features of your installation. This record provides valuable information for future maintenance or repairs.
Following these steps ensures a successful and efficient solar panel attachment process. Ensure adherence to safety regulations and local guidelines throughout installation for optimal performance and compliance.
Connecting the Inverter
Connecting the inverter is an essential step for a solar power system installation. Proper connection ensures efficient energy conversion from solar panels to usable electricity for your home or business.
- Select the inverter location. Choose a shaded spot near the main service panel to minimize the distance of the wiring. Avoid placing the inverter in direct sunlight to prevent overheating. The area should also allow easy access for maintenance and monitoring.
- Install the inverter mount. Use mounting brackets and screws to secure the inverter to the wall. Ensure the inverter is level and firmly attached. Additionally, position the unit vertically to maintain its proper operation.
- Connect solar panel wiring. Bring the DC wiring from the solar panels to the inverter’s DC terminals. Strip insulation from the wire ends, ensuring they are clean and free of damage. Tighten the terminal screws to secure the connections, making sure to observe the positive and negative terminals.
- Connect to the main service panel. Run AC wiring from the inverter to the main service panel. Select appropriate gauge wiring based on the inverter’s output capacity. Strip and connect the wire ends to the inverter’s AC output terminals, ensuring proper polarity.
- Install a circuit breaker. Integrate a dedicated circuit breaker for the inverter in your main service panel. This step enhances safety by allowing the system to shut down during maintenance or in case of faults.
- Connect the ground wire. Attach the ground wire from the inverter to the grounding system in your electrical panel. This connection prevents electrical shock and enhances system safety.
- Perform a system check. Before powering on the system, review all connections for any loose wiring or incorrect polarity. Confirm compliance with local electrical codes and regulations.
- Power on the inverter. Once confirmed, switch on the inverter and allow it to initiate. Monitor the display for proper functioning and any error messages.
By following these steps, you ensure your inverter is connected properly and ready for operation.
Wiring the System
Wiring the solar power system requires careful attention to details to ensure safety and performance. Follow these steps for a successful wiring process.
Gather Required Materials
- Wiring: Use UV-resistant, weather-rated wiring for outdoor installations. Select the appropriate gauge based on the system’s ampacity.
- Connectors: Obtain MC4 connectors for solar panel connections. Utilize junction boxes for organizing wires and ensuring weather-resistant connections.
- Tools: Collect wire strippers, crimpers, a multimeter, and a drill for effective installation.
Plan the Wiring Layout
- Determine Pathways: Identify the path for wiring from solar panels to the inverter and then to the electrical panel. Ensure accessibility for future maintenance.
- Minimize Length: Reduce the distance between solar panels and the inverter to prevent voltage drop. Aim for less than 10 feet when possible.
Connect Solar Panels
- Wiring Configuration: Decide on a series or parallel configuration based on system design. Series connections increase voltage, while parallel connections increase current.
- Secure Connections: Use MC4 connectors to join the solar panel leads. Ensure a tight fit to prevent water ingress.
Connect to the Inverter
- Run Wires to Inverter: Route the wires from the solar panels to the inverter. If possible, place the inverter in a shaded area to increase efficiency.
- Follow Guidelines: Connect the positive wire from the solar panel to the positive terminal on the inverter and the negative wire to the negative terminal.
Connect to the Electrical Panel
- Install a Dedicated Circuit Breaker: Add a dedicated circuit breaker in the electrical panel to isolate the solar system. This adds safety and control.
- Connect Wiring: Run the inverter output to the circuit breaker. Connect the wires to their respective terminals within the panel.
Ground the System
- Grounding Rod: Drive a grounding rod into the earth close to the inverter. Use a minimum 6 AWG copper wire to connect the rod to the inverter’s grounding terminal.
- Bonding: Ensure the entire system is bonded properly to avoid shock hazards. Check local codes for specific grounding requirements.
Test Connections
- Use a Multimeter: Measure voltage at various points in the system. Ensure readings match intended system output levels.
- Inspect Connections: Visually check all connections for security and integrity. Tighten any loose connections.
Final Inspection
- Review Wiring Layout: Ensure all wires are organized neatly and secured. Avoid sharp bends and ensure no wires are pinched.
- Compliance Check: Confirm that all installations comply with local regulations and codes. Consult a licensed electrician for verification if unsure.
Following these steps provides a robust wiring system for your solar power setup. This careful approach enhances overall safety and efficiency of your solar energy system.
Testing the System
Testing your solar power system ensures it operates correctly and efficiently after installation. Follow these crucial steps to verify functionality and safety.
Check Connections
Check all electrical connections. Ensure that solar panel wires connect correctly to the inverter and that terminal screws are tight. Inspect the inverter connections to the service panel. Look for any signs of damage or wear.
Inspect Circuit Breakers
Inspect the main circuit breaker and dedicated circuit breakers for the inverter. Confirm that all breakers are in the “on” position and functioning properly. Replace any faulty breakers quickly to ensure safety.
Monitor Inverter Display
Monitor the inverter display for any warning lights or error messages. A clear display with no alarms indicates good operation. If there are warnings, consult the inverter manual for troubleshooting guidelines.
Test System Output
Test the output of your solar power system. Use a multimeter to measure the voltage and current produced by the solar panels. Compare the readings against the specifications listed for your solar panels.
Examine Energy Meter
Examine your energy meter to check the energy production recorded from the solar system. Look for increasing numbers during sunshine hours. If the meter shows no change, troubleshoot the system.
Conduct Full System Check
Conduct a full system check after several days of operation. Ensure that panels are free from obstructions like dirt or debris. Regular maintenance contributes to better performance.
Review Monitoring Systems
Review any installed monitoring systems. These systems provide real-time data regarding energy production. Make adjustments based on performance data to maximize efficiency.
Schedule Professional Inspection
Schedule a professional inspection after installation. A qualified technician can identify any hidden issues and confirm compliance with local codes. This step adds peace of mind regarding system performance.
By following these testing steps, you verify that your solar power system operates efficiently and safely.
Maintenance and Support
Maintaining a solar power system ensures its efficiency and longevity. Regular care not only helps in maximizing energy production but also assists in identifying any potential issues early.
Regular System Checks
Conducting Regular System Checks proves crucial for maintaining an effective solar power system. Check the inverter monthly to ensure it displays normal operation and no warning signals. Verify that the solar panels remain clean and free from debris by inspecting them every few weeks, especially after heavy storms. Evaluate electrical connections and wiring during these inspections, ensuring all connections stay secure and intact.
Monitor performance by reviewing the energy output. Compare it against expectations based on your solar panel installation size and local weather patterns. If energy output appears lower than usual, investigate further. Contact a professional for comprehensive system checks annually to keep everything functioning well and address any technical issues.
Document maintenance tasks and findings in a maintenance log. This log helps track performance trends and aids in future inspections. Regular checks reinforce system reliability and help protect your investment in solar energy.
Cleaning Solar Panels
Cleaning solar panels plays a significant role in maintaining their efficiency. Dirt, dust, and debris can accumulate and block sunlight, ultimately reducing energy output. Aim to clean panels twice a year, with additional cleanings after severe weather conditions or significant dust storms.
Use a soft brush or sponge with warm, soapy water to gently scrub the surface. Avoid harsh chemicals or abrasive materials that may scratch the panels. For those with roof-mounted systems, take precautions with ladders or hire a professional cleaning service for safety.
Check nearby trees or foliage and trim back branches that might cast shadows on panels. This proactive approach helps ensure optimal sunlight exposure and enhances overall efficiency. Keeping solar panels clean becomes essential for long-term performance and maximizing energy production.
Conclusion
Installing a solar power system is a smart investment that offers both financial savings and environmental benefits. By understanding the installation process and carefully selecting components you can ensure your system operates efficiently. Regular maintenance and monitoring will keep your solar energy production at its peak.
As you move forward with your solar journey remember to consult professionals when needed and stay informed about local regulations. This proactive approach not only enhances your energy independence but also contributes to a sustainable future. Embrace the benefits of solar energy and enjoy the long-term rewards it brings to your home and the planet.
Frequently Asked Questions
What are the main benefits of installing a solar power system?
Solar power systems provide financial savings by reducing electricity bills and may offer incentives. They also have environmental benefits, as they lower carbon footprints, increase energy independence, and can enhance property value.
How do solar power systems work?
Solar power systems convert sunlight into electricity using components like solar panels, inverters, and mounting structures. Solar panels capture sunlight, which is then converted into usable electricity by the inverter.
What should I consider before installing solar panels?
Evaluate your property’s energy needs, roof orientation, and local regulations. Review your electricity bills, assess peak energy consumption, and consult a solar professional for an energy audit to size the solar array correctly.
What’s the difference between grid-tied and off-grid systems?
Grid-tied systems connect to the local electricity grid, allowing you to draw power when needed and sell excess energy. Off-grid systems operate independently, using batteries to store energy for use when sunlight is not available.
What tools are needed for solar panel installation?
Essential tools include basic hand tools like screwdrivers and wrenches, power tools such as drills and saws, and safety gear like gloves and safety glasses to ensure safe and efficient installation.
How should I prepare my installation site?
Conduct a thorough assessment for sufficient sunlight exposure and minimal shading. Check the roof’s condition and orientation, and review local regulations to ensure compliance before installation.
What steps are involved in the installation process?
The installation process includes site preparation, mounting hardware installation, attaching solar panels, connecting inverter wiring, and performing a final inspection to ensure safety and efficiency.
