


Thinking about going solar? You’re not alone. More homeowners are making the switch to solar electricity, drawn by the promise of lower energy bills and a smaller carbon footprint. A solar electricity setup can transform your home into an eco-friendly powerhouse while providing long-term savings.
Understanding the components of a solar system is crucial for making informed decisions. From solar panels to inverters and battery storage, each part plays a vital role in harnessing the sun’s energy. With the right setup, you can maximize efficiency and ensure your home runs smoothly on renewable energy.
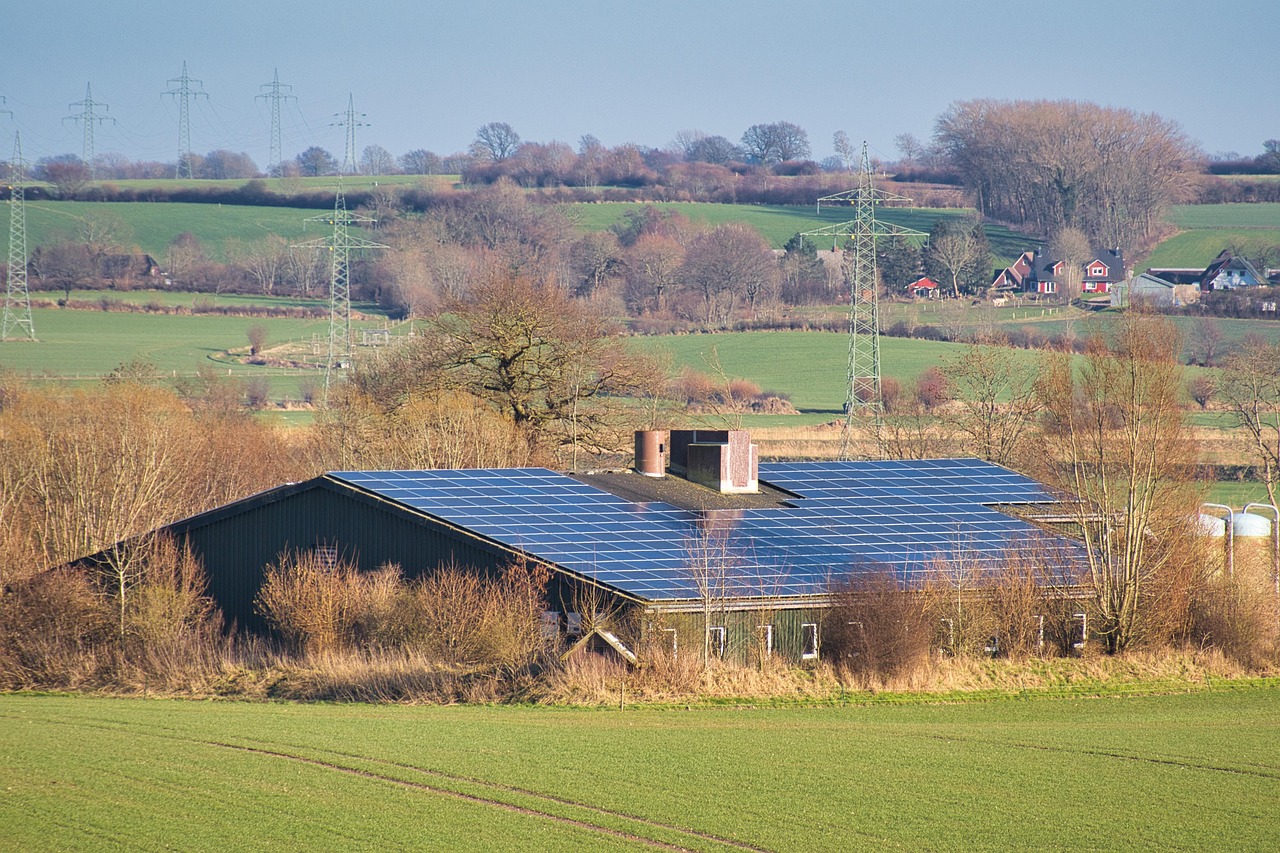
Understanding Solar Electricity Setup
Understanding the setup of solar electricity involves several key components and steps to ensure an efficient system. Follow these guidelines to create an effective solar electricity system.
Components of a Solar Electricity System
- Solar Panels: Solar panels capture sunlight and convert it into electricity. Choose panels based on efficiency ratings and warranty periods for optimal performance.
- Inverters: Inverters convert direct current (DC) from solar panels into alternating current (AC) for home use. Select a reliable inverter that matches your energy needs.
- Battery Storage: Battery storage systems collect excess energy generated during sunny days. Use batteries to store energy for nighttime or cloudy days, enhancing reliability.
- Mounting Systems: Mounting systems secure solar panels to your roof or ground. Ensure that the mounting hardware is compatible with local climate conditions to maintain stability.
- Energy Monitoring Systems: Energy monitoring systems track the performance of your solar array. Monitor usage patterns to make informed decisions about energy consumption.
Steps to Install Solar Electricity Setup
- Evaluate Your Energy Needs: Assess your daily energy consumption by reviewing past utility bills. Determine the required capacity of your solar system based on these numbers.
- Site Assessment: Conduct a site assessment to evaluate solar exposure. Check for shading from trees or buildings that may affect solar panel performance.
- Choose a Solar Energy Provider: Research and select a reputable solar energy provider. Review their ratings, reviews, and past projects for credibility.
- Obtain Permits: Secure necessary permits from your local government before installation. This step ensures compliance with safety standards and regulations.
- Install the System: Schedule the installation with your chosen provider. Ensure qualified technicians handle the installation to optimize performance and safety.
- Connect to the Grid: Work with your utility provider to connect your solar system to the grid. This step facilitates net metering, allowing you to receive credit for excess energy.
Maintenance of Solar Electricity System
- Regular Inspections: Conduct routine inspections to check for debris or dirt on panels. Clean panels as needed to maintain optimal efficiency.
- Monitor Performance: Utilize monitoring systems to track energy generation. Compare actual output to expected performance to identify potential issues.
- Battery Maintenance: Check your battery health regularly. Follow manufacturer guidelines for maintenance to ensure longevity and efficiency.
These components and steps create a solid foundation for a successful solar electricity setup. Focusing on each aspect allows for reliable energy production and sustainable living.
Benefits of Solar Electricity
Switching to solar electricity offers several significant advantages for homeowners. Understanding these benefits can help you make an informed decision about investing in solar energy.
Environmental Advantages
Solar electricity reduces greenhouse gas emissions, contributing to cleaner air and a healthier environment. By utilizing solar panels, you minimize reliance on fossil fuels. The reduction in carbon footprint plays a vital role in combating climate change and promoting sustainability.
Solar power generates energy without harmful byproducts, making it eco-friendly. The use of solar energy leads to fewer pollutants released into the atmosphere. According to the U.S. Environmental Protection Agency, solar energy systems have the potential to reduce carbon pollution by over 100 million metric tons annually.
Using solar electricity enhances energy independence. By generating your own power, you decrease reliance on external energy sources. This independence ensures cleaner energy and promotes national energy security.
Choosing solar energy can create a positive impact on local ecosystems. Solar panels require less water compared to conventional electricity generation methods. The overall reduced environmental impact contributes to healthier flora and fauna.
Financial Savings
Investing in solar electricity leads to long-term financial savings. Lower energy bills occur as solar panels produce energy from sunlight. Homeowners can save anywhere from 15% to 50% on their monthly utility bills depending on energy consumption and location.
Tax incentives and rebates reduce the upfront cost of solar systems. The federal solar tax credit allows you to claim a percentage of solar system costs when filing taxes. Many states and local governments also offer additional incentives, often making solar more affordable.
Adding solar panels to your home increases property value. Studies indicate that homes with solar systems sell for an average of 3% to 4% more than those without. This added equity benefits homeowners when selling their property.
Solar energy requires minimal maintenance compared to traditional energy sources. Routine inspections and occasional cleaning maintain system efficiency without significant costs. This longevity further enhances your financial return on investment.
Overall, solar electricity presents substantial environmental and financial advantages that support a sustainable and cost-effective lifestyle.
Planning Your Solar Electricity Setup
Planning a solar electricity setup involves several key steps. Taking the time to evaluate your options ensures an efficient system tailored to your needs.
Assessing Your Energy Needs
Assessing your energy needs forms the foundation of your solar electricity setup. Begin by reviewing your recent electricity bills. Observe the average monthly consumption in kilowatt-hours (kWh) over the past year.
- Calculate Your Usage: Identify your peak usage months. Note any patterns to account for seasonal changes. Consider special appliances or equipment that might increase your consumption.
- Project Future Needs: Anticipate potential changes in your lifestyle. Will there be new appliances or devices? Estimating increased usage helps in sizing your solar system appropriately.
- Determine System Size: Divide your total energy consumption by the average output of solar panels in your area. This calculation provides an estimate of the number of panels needed. A typical residential system can range from 5 kW to 10 kW, depending on energy demand.
Understanding your energy needs ensures that the system design effectively meets your consumption patterns and future demands.
Evaluating Your Property
Evaluating your property is critical for solar panel placement and efficiency. Several factors influence how well your setup performs:
- Roof Orientation: Assess the roof’s orientation and angle. South-facing roofs typically receive the most sunlight in Northern Hemisphere locations. Optimizing panel placement increases energy production.
- Shade Assessment: Identify any potential shading issues from trees, buildings, or other obstructions. Use online tools or physical assessments to gauge shade impacts throughout the day. Minimizing shade maximizes solar energy absorption.
- Structural Integrity: Inspect the roof’s condition. Ensure that it can support the weight of solar panels. If repairs or upgrades are necessary, complete them before installation.
- Local Regulations: Familiarize yourself with local zoning laws and building codes. Some areas may require specific permits for solar installations. Securing necessary approvals avoids delays and complications in the setup process.
Assessing your property ensures a successful installation and optimal solar electricity performance tailored to your surroundings.
Materials Needed for Solar Electricity Setup
Gathering the right materials is essential for a successful solar electricity setup. Each component plays a vital role in converting sunlight into usable energy.
Solar Panels
Solar panels are the heart of your solar electricity system. They capture sunlight and convert it into electricity. Choose panels based on efficiency and warranty. Common choices include monocrystalline and polycrystalline panels. Monocrystalline panels offer higher efficiency but come at a higher price. Polycrystalline panels are less expensive but typically less efficient. Determine your energy needs to calculate how many panels you require. For example, if your household needs 10,000 kWh per year, you might need around 20 panels, depending on panel efficiency and sunlight exposure.
Inverters
Inverters convert direct current (DC) electricity generated by solar panels into alternating current (AC) electricity used in homes. Select inverters based on efficiency, compatibility, and warranty. There are three main types: string inverters, microinverters, and power optimizers. String inverters work well for systems with consistent sunlight exposure. Microinverters offer better performance in shaded areas, while power optimizers enhance energy output from each panel. Proper inverter sizing and placement optimize energy conversion.
Mounting Equipment
Mounting equipment secures solar panels to your roof or ground. This equipment includes mounting brackets, rails, and hardware. Choose a mounting system based on your roof type and panel orientation. Roof-mounted systems require fewer materials than ground-mounted systems. Ensure mounting equipment allows for proper drainage and airflow around the panels. Use durable materials like aluminum or stainless steel to withstand weather conditions. Proper installation enhances panel longevity and performance.
Batteries (If Needed)
Batteries store excess energy generated by solar panels for later use. This is especially useful for nighttime consumption or during power outages. Choose batteries based on capacity and chemistry types, such as lead-acid or lithium-ion. Lithium-ion batteries generally have a longer lifespan and higher efficiency. Calculate your backup energy needs by assessing daily usage and desired backup duration. For a household needing 10 kWh of backup per night, 10 kWh of battery capacity is necessary. Consider investing in a battery if your home has potential for energy independence or if frequent power outages occur.
Wiring and Cabling
Wiring and cabling connect the solar panels to the inverter and battery. Use high-quality, weather-resistant cables to ensure safety and efficiency. Select wire gauge based on distance and expected amperage to minimize voltage drop. Typically, a 10 or 12-gauge wire suffices for most residential setups. Pay attention to cable lengths and connectors to prevent energy loss. Properly secure and route wires to avoid exposure to elements, securing them indoors or using conduit where necessary. Regularly inspect wiring for wear to maintain performance.
Tools Required
Successful solar electricity setup relies on specific tools. Familiarity with these tools enhances the installation process and ensures efficiency.
Basic Hand Tools
Basic hand tools are essential for the physical installation of a solar electricity system. Maintain a checklist to gather the following tools:
- Screwdrivers: Use various sizes for securing panels and components.
- Wrenches: Employ adjustable wrenches for tightening bolts on mounts and panels.
- Drill: Utilize a power drill with bits for making holes in mounting surfaces.
- Tape Measure: Use this for precise measurements of panel placements.
- Level: Ensure mounts are even for optimal panel performance.
- Pry Bar: Use for adjustments during installation or removing old structures.
- Safety Glasses: Protect your eyes from debris.
Use hand tools effectively to prepare your site and install the equipment. Proper tools guarantee a smooth installation.
Electrical Tools
Electrical tools play a crucial role in connecting your solar panels to the electrical system. Collect these tools for your setup:
- Wire Strippers: Use for removing insulation from electrical wires.
- Multimeter: Measure voltage, current, and resistance to ensure correct electrical readings.
- Crimping Tool: Apply connectors to cables securely.
- Voltage Tester: Check for live wires to enhance safety during the installation.
- Conduit Bender: Bend and shape electrical conduit for smooth runs.
- Cable Tie: Organize and secure wires neatly for a tidy appearance.
Incorporating the right electrical tools ensures safe and correct connections within your solar system. Proper use of these tools aids in achieving a reliable installation.
Step-by-Step Guide to Setting Up Solar Electricity
Setting up solar electricity involves several essential steps to ensure an effective installation. Follow these steps closely for optimal results.
Step 1: Choose the Right Location
Choosing the correct location for solar panels significantly impacts energy production. Ensure the area receives maximum sunlight throughout the day. Evaluate your roof’s orientation; south-facing roofs typically receive the most exposure. Consider shade from trees, buildings, or other obstructions that could limit sunlight. Assess the roof’s structural integrity; it must support the weight of the panels. Use tools like a solar pathfinder to measure sunlight throughout the year for precise information.
Step 2: Mounting the Solar Panels
Mounting solar panels correctly is crucial for long-term durability and efficiency. Select appropriate mounting systems based on your roof type, whether flat or sloped. Install racking systems securely; use bolts and brackets to fasten them to the roof structure. Ensure that the panels are tilted at an angle for optimal solar exposure, typically between 18 to 36 degrees. Check for proper spacing between panels to minimize shading. Verify that all mounting components are corrosion-resistant to enhance lifespan.
Step 3: Wiring the System
Wiring involves connecting solar panels to the inverter and other system components. Use high-quality wiring to ensure safety and efficiency; typically, use copper wire rated for outdoor use. Connect the solar panels in series or parallel depending on your voltage requirements. Ensure that the connections are tight and well-insulated to prevent any energy loss. Follow the manufacturer’s specifications for wiring configurations. Install conduit to protect the wiring from environmental elements and prevent physical damage.
Step 4: Installing the Inverter
Installing the inverter requires careful attention to detail. Select an inverter type based on your system design, whether string, micro, or power optimizers. Mount the inverter in a shaded, cool area to optimize cooling and efficiency. Connect the DC wires from the solar panels to the inverter’s DC input terminals, ensuring correct polarity. Ground the inverter to safeguard against electrical faults. Utilize appropriate conduit to route the DC wires safely to the inverter. Follow installation guidelines precisely to ensure reliable performance.
Step 5: Connecting to the Grid (If Applicable)
Connecting to the grid involves interfacing your solar system with the local utility. Consult regional regulations and guidelines before proceeding with the connection. Inform your utility company about your solar installation plans; they may require an inspection of your system. Install a bi-directional meter; this device measures energy sent to and received from the grid. Conduct tests to ensure the system produces energy as expected and synchronizes correctly with the grid. Confirm that safety protocols are in place, including circuit breakers and disconnect switches, to protect both the system and the grid.
Tips for an Efficient Setup
Installing a solar electricity system requires attention to detail and optimized strategies to ensure maximum efficiency.
Optimal Angling of Solar Panels
Positioning solar panels at the correct angle significantly impacts energy production. Each location has an optimal tilt angle, typically between 30 to 45 degrees, depending on your geographic location. You can calculate the best angle using the formula: Latitude x 0.76. For example, if you live at a latitude of 40 degrees, an optimal angle would be approximately 30 degrees.
Adjust panels to face true south in the Northern Hemisphere or true north in the Southern Hemisphere. This orientation allows for increased sunlight exposure. You can also consider seasonal adjustments; tilting panels higher during winter months captures more light when the sun is lower in the sky.
Utilizing adjustable mounts enables you to change angles easily. Regularly check for shading from trees, buildings, or other structures. Any shading on panels can significantly reduce their efficiency, so keep the area clear.
Regular Maintenance Suggestions
Regular maintenance plays a vital role in keeping your solar system operating at peak performance. Start by visually inspecting the panels for dirt, debris, or snow accumulation. Clean the panels at least twice a year to prevent dust buildup that blocks sunlight. Use a soft brush or a hose to remove debris without damaging the panels.
Check the inverter status regularly. Inverters have lights that indicate their operation status. Familiarize yourself with these light indicators to quickly identify any issues. If a red light flickers, contact a professional.
Inspect mounting hardware to ensure all components remain secure and corrosion-free. Check wiring for insulation damage or signs of wear.
Consider scheduling a professional inspection every few years to verify system performance and address any potential issues. Utilize monitoring systems to track energy production and identify unexpected drops in output promptly.
Conclusion
Embracing solar electricity can transform your home into a beacon of sustainability. By understanding the components and processes involved in setting up your solar system, you’re taking a significant step toward reducing energy costs and minimizing your carbon footprint.
With the right tools and knowledge, you can ensure your solar setup operates efficiently and effectively. Regular maintenance and monitoring will keep your system performing at its best, allowing you to enjoy the long-term benefits of solar energy.
As you move forward, remember that each step you take contributes to a cleaner environment and a more independent energy future. The journey to solar power is not just about saving money; it’s about making a positive impact on the planet for generations to come.
Frequently Asked Questions
What are the main benefits of switching to solar electricity?
Switching to solar electricity offers several benefits, including reduced energy bills, lower carbon footprints, and increased energy independence. Additionally, solar power contributes to cleaner air by generating energy without harmful emissions, and it can enhance property value while providing potential tax incentives and rebates.
What are the key components of a solar electricity system?
A solar electricity system primarily consists of solar panels, inverters, battery storage, mounting systems, and energy monitoring systems. Each component plays a vital role in harnessing solar energy efficiently, from capturing sunlight to converting and storing electricity for use.
What tools are necessary for a solar electricity setup?
Essential tools for a solar electricity setup include basic hand tools like screwdrivers, drills, and wrenches, as well as electrical tools such as wire strippers, multimeters, and voltage testers. Having the right tools ensures a safe and efficient installation process.
What steps are involved in installing a solar electricity system?
Installing a solar electricity system involves several steps: evaluating energy needs, conducting a site assessment, choosing a provider, obtaining necessary permits, and connecting to the grid. Proper planning and execution are crucial for an effective setup.
Are there government incentives for installing a solar electricity system?
Yes, many regions offer tax incentives, rebates, and other programs to encourage homeowners to install solar electricity systems. These incentives can significantly reduce the overall cost, making solar energy a more affordable option for many.
