


Thinking about going solar? You’re not alone. As energy costs rise and environmental concerns grow, more people are turning to solar panels to power their homes. A solar panel setup not only helps you save on utility bills but also contributes to a cleaner planet.
Understanding the basics of solar panel installation is crucial for making informed decisions. From choosing the right equipment to finding the best location for your panels, every step matters. With the right knowledge, you can harness the sun’s energy efficiently and effectively.
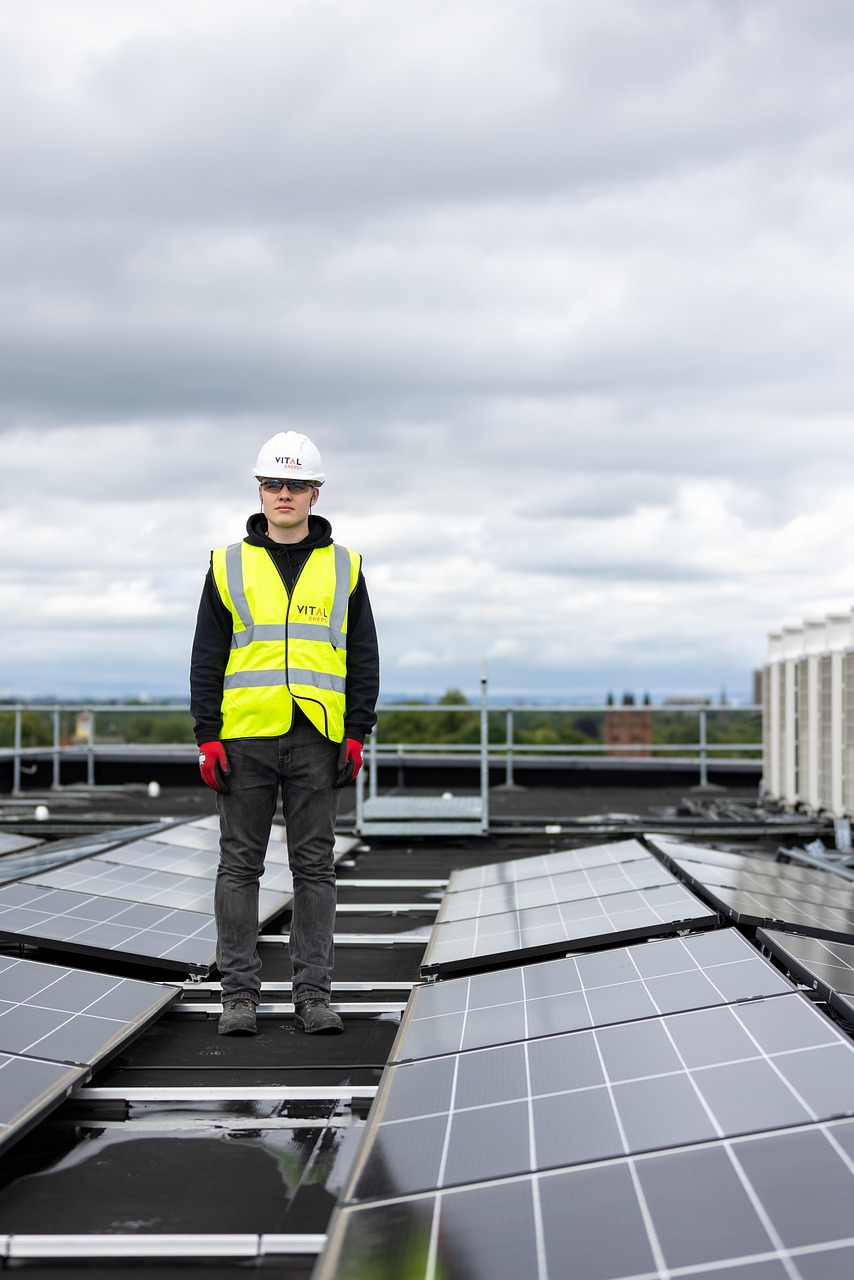
Understanding Solar Panel Setup
Setting up solar panels requires several important steps to ensure optimal performance and efficiency. You can follow this guide to gain a clear understanding of the process involved.
1. Evaluate Your Energy Needs
Determine your energy consumption by analyzing your utility bills. Identify the monthly average in kilowatt-hours (kWh). This information helps establish the number of solar panels needed for your setup.
2. Assess Roof Condition and Orientation
Inspect your roof for structural integrity and suitability for solar panel installation. Focus on the following:
- Material: Asphalt shingles, metal, and tile roofs work well for solar.
- Orientation: South-facing roofs generally receive the most sunlight.
- Angle: A slope between 15 to 40 degrees enhances sunlight exposure.
3. Choose the Right Type of Solar Panels
Select solar panels based on efficiency, durability, and cost. Key types include:
- Monocrystalline: High efficiency and longevity.
- Polycrystalline: More affordable but slightly less effective.
- Thin-film: Lightweight and flexible, ideal for specific applications.
4. Inventory Additional Equipment
Gather necessary equipment for installation:
- Inverter: Converts direct current (DC) generated by panels into alternating current (AC).
- Mounting System: Secures panels in place.
- Battery Storage (if applicable): Stores excess energy for use during low production times.
- Wiring: Connects panels to the house wiring and inverter.
5. Obtain Permits and Approvals
Check with local authorities for permits required for solar installations. Compliance with zoning laws and building codes is essential. Obtain necessary approvals before proceeding.
6. Plan the Layout
Organize the panel layout for maximum sunlight coverage. Arrange panels to minimize shading from trees or nearby structures. Ensure access for maintenance.
7. Installation Process
Follow these steps for installation:
- Mounting: Secure the mounting system to the roof.
- Panel Placement: Attach solar panels to the mounting system.
- Wiring: Connect panels to the inverter using appropriate wiring.
- Inverter Installation: Install the inverter in a shaded area for optimal performance.
- Final Connections: Connect the inverter to your electrical panel.
8. Inspection and Testing
Conduct an inspection of the entire setup. Check for:
- Proper wiring connections
- Secure panel and inverter installations
- No visible damage to components
Test the system to ensure it functions correctly. Monitor performance after setup to verify energy production meets expectations.
9. Maintenance Practices
Regular maintenance enhances longevity. Schedule periodic inspections for any signs of wear. Clean panels to remove dirt and debris that might block sunlight, ideally every six months.
By following these steps, you establish an efficient solar panel setup that contributes to energy savings and environmental benefits.
Materials Needed for Solar Panel Setup
A successful solar panel setup requires essential materials that ensure optimal performance and efficiency. Gather the following components for your installation.
Solar Panels
Solar Panels convert sunlight into electricity. Three types of panels include monocrystalline, polycrystalline, and thin-film. Monocrystalline panels offer higher efficiency and better space utilization. Polycrystalline panels provide a cost-effective solution but come with slightly lower efficiency. Thin-film panels provide flexibility in installation and can work well in specific situations such as smaller spaces or unique roof shapes. Assess your energy needs to choose the right panel type. Look for panels with a warranty of at least 25 years for assurance of quality and longevity.
Inverter
Inverters play a crucial role in transforming direct current (DC) electricity generated by the solar panels into alternating current (AC) electricity that powers household appliances. There are three main types of inverters: string inverters, microinverters, and power optimizers. String inverters connect multiple panels in a series, while microinverters are attached to each panel individually, allowing for better performance in shaded areas. Power optimizers work similarly to microinverters but are used in conjunction with string inverters. Choose an inverter based on your setup and energy requirements, ensuring it matches the output capacity of your solar panel system.
Mounting Hardware
Mounting Hardware secures solar panels to your roof or ground. Hardware components include rails, brackets, and flashing. Rails provide the framework to attach panels, while brackets securely hold panels in place. Flashing seals any roof penetrations to prevent leaks. Select mounting systems compatible with your roof type (e.g., asphalt shingles, metal, or tile). Adjustable tilt mounts can optimize panel angle, enhancing energy capture. Ensure hardware is durable for wind and weather resilience.
Battery Storage (Optional)
Battery storage allows you to store excess energy generated during sunny days for use during low sunlight hours or outages. Lithium-ion and lead-acid batteries serve as common options. Lithium-ion batteries offer higher energy density, longer life, and lower maintenance, while lead-acid batteries are less costly but have a shorter lifespan. Battery storage systems can provide energy independence. Evaluate your consumption patterns to decide if battery storage enhances your solar strategy.
Wiring and Connectors
Wiring and Connectors are essential for connecting solar panels to the inverter and subsequent electrical systems. Use rated wiring, such as THHN or PV wire, designed for outdoor and high-temperature environments. Connectors include MC4 connectors, which ensure secure and weatherproof connections between panels and wiring. Strain relief and cable management accessories keep cables organized and protect them from wear. Follow local electrical codes, including conduit installation when necessary, to ensure safety and compliance.
Tools Required for Solar Panel Installation
Tools play a vital role in the solar panel installation process. Using the right tools ensures efficiency and safety throughout the project. Below is a detailed list of essential tools required for a successful installation.
Basic Hand Tools
Basic hand tools are crucial for various tasks during solar panel installation. Equip yourself with the following items:
- Screwdriver Set: Use a variety of screwdrivers including flathead and Phillips to secure mounting brackets and panels.
- Pliers: Employ pliers for bending and gripping wires. They help in securing connections effectively.
- Wrench Set: A set of adjustable wrenches and socket wrenches facilitates tightening bolts on mounting hardware.
- Measuring Tape: Measure distances accurately for optimal panel placement and mounting hardware installation.
- Level: Ensure panels are installed evenly by using a level, preventing any misalignment.
- Utility Knife: Cut various materials, including cable ties and protective sheathing, using a sharp utility knife.
- Wire Strippers: Prepare wires for connections by stripping insulation off the ends with proper wire strippers.
These basic hand tools support a smooth installation process and enhance the overall quality of your work.
Power Tools
Power tools increase efficiency and save time during installation. For a successful setup, utilize the following:
- Drill: A cordless drill or impact driver is essential for drilling holes in your roof and installing fasteners.
- Circular Saw: Cut mounting brackets or other materials to size with a circular saw for precision.
- Angle Grinder: Use an angle grinder to smooth edges or cut metal components as required during installation.
- Soldering Iron: Connect wires securely by using a soldering iron to make strong electrical connections when necessary.
- Multimeter: Test the electrical output and check voltage and current levels using a multimeter to ensure all connections work correctly.
Having the right power tools streamlines various tasks and contributes to a successful solar panel installation.
Safety Equipment
Safety equipment is paramount when working on solar panel installations. Prioritize your safety and use these items:
- Safety Glasses: Protect your eyes from debris and dust by wearing safety glasses during the installation process.
- Gloves: Use durable gloves to shield your hands from sharp edges and electrical hazards while handling tools and materials.
- Hard Hat: Wear a hard hat to guard against falling objects, particularly when working on rooftops or elevated areas.
- Harness: If working at height, utilize a safety harness to prevent falls, ensuring secure anchorage points.
- First Aid Kit: Keep a first aid kit close in case of any accidents or injuries during the installation.
Using proper safety equipment reduces the risk of accidents and promotes a secure working environment.
Planning Your Solar Panel Setup
Planning plays a crucial role in the success of your solar panel setup. Assessing your energy needs, evaluating roof space, and selecting the right solar panels all contribute significantly to an efficient solar energy system.
Assessing Your Energy Needs
Assess your energy requirements by reviewing your utility bills for the past year. Gather data on your monthly consumption in kilowatt-hours (kWh). This helps in determining the number of solar panels needed.
Calculate your average monthly usage. For example, if your monthly consumption averages 750 kWh, then you require panels that can produce enough energy to cover this consumption. A standard solar panel generates about 300 watts. At peak sun hours, a single panel can produce 1.2 kWh daily. Divide your energy needs by the output of the panels to find the number of panels needed for your setup.
Consider future energy needs when making your estimate. If you plan to purchase electric vehicles or add appliances, factor in those additional requirements. This ensures your solar system can accommodate not just current usage but also future growth.
Evaluating Roof Space
Evaluate your available roof space to determine the optimal layout for your solar panels. Measure the dimensions of your roof to identify areas that receive direct sunlight. These areas are more suitable for panel placement, increasing energy generation.
Check for obstructions that could block sunlight, such as chimneys, trees, or nearby buildings. Ideally, solar panels should be installed on a south-facing roof, as this position maximizes sun exposure throughout the day. If your roof faces east or west, you can still achieve good energy production but may require more panels.
Ensure your roof is structurally sound and capable of supporting the weight of the solar installation. Repair or reinforce areas if necessary. Consider factors like angle and material of the roof, as these also influence panel placement and installation methods.
Selecting the Right Solar Panels
Select solar panels that align with your energy needs and budget. The three main types of solar panels are monocrystalline, polycrystalline, and thin-film. Each type has unique benefits and drawbacks.
Monocrystalline panels are highly efficient, typically producing more power per square foot. If space is limited, these may be the optimal choice despite a higher cost. Polycrystalline panels offer a more affordable option with moderate efficiency. They are ideal for larger roofs where space isn’t a concern.
Thin-film solar panels are lightweight and flexible, making them a great option for unconventional surfaces. However, they generally have lower efficiency rates compared to crystalline options. Evaluate your energy needs, budget, and roof space to make an informed decision on the best panel type for your setup.
Consider warranties and performance guarantees from manufacturers. These additional factors contribute to the long-term value of your solar investment, ensuring reliability and performance over time.
Steps for Installing Your Solar Panels
Installing solar panels involves a systematic process that ensures optimal efficiency and longevity. Follow these essential steps for a successful installation.
Preparing the Site
Evaluate the installation area to ensure suitability. Inspect your roof for structural integrity and confirm it can support solar panels. Remove debris, branches, or any potential obstructions to maximize sunlight exposure. Measure roof dimensions to determine available space for panels. Assess shading from trees or nearby buildings to avoid energy loss. Additionally, verify local building codes and homeowners association guidelines to ensure compliance. Completing these steps sets a solid foundation for the installation process.
Mounting the Solar Panels
Begin the mounting process by selecting an appropriate mounting system for your roof type, whether it’s flush or tilt mounts. Position the mounts according to the panel layout previously planned. Use a level to ensure accuracy during installation. Secure the mounts with screws and bolts to prevent movement. Check the alignment and spacing based on the number of panels. Double-check connections and tighten all hardware, ensuring they are waterproofed if applicable. This step guarantees that your panels remain securely attached and optimally positioned.
Connecting the Inverter
Select a suitable inverter based on your panel specifications and energy needs. Locate the inverter installation site, usually near the main electrical panel. Mount the inverter and ensure it is accessible for maintenance. Follow manufacturer guidelines for wiring connections, starting from the solar panels to the inverter. Connect the positive and negative leads according to color coding. Install the grounding wire as required. Complete the setup by linking the inverter to the electrical panel. Proper connections allow for effective energy conversion from solar panels.
Wiring the System
Prepare your wiring system by selecting appropriate wire types based on local electrical codes. Start by running wires from the solar panels to the inverter. Use conduit to protect wires when necessary, particularly for outdoor runs. Connect the DC wires to the inverter and secure all connections. Follow safety protocols by turning off the main power before making electrical connections. Use a multimeter to test the system for proper voltage. This step ensures electrical efficiency and safety throughout your solar panel system.
Setting Up Battery Storage (If Applicable)
If battery storage is part of your setup, choose compatible batteries based on energy needs and inverter specifications. Locate a dry, cool area for battery installation, ensuring adequate ventilation. Connect batteries in parallel or series based on your system configuration. Follow the manufacturer’s instructions closely for wiring connections between batteries and the inverter. Implement safety features, including circuit breakers and fuses, to protect your system. Complete testing to confirm that your battery storage effectively retains energy produced by solar panels. This setup supports energy independence and maximizes your solar investment.
Testing Your Solar Panel System
Testing your solar panel system ensures that everything functions efficiently and safely. Conducting these tests allows you to analyze performance and identify any issues.
Initial System Check
Begin the initial system check after installation. Inspect all components for visible damage or loose connections. Confirm that the solar panels are clean and free from debris. Check wiring for any signs of wear or improper installation. Verify that the inverter displays the correct voltage and settings.
Next, confirm that the circuit breaker is turned on. Monitor the inverter’s light indicators to ensure normal operation. The manual for the inverter provides specific information on the meaning of indicator lights. Inspect the battery storage system, if installed. Verify that it’s connected properly and shows a charge.
Document all readings and observations during this initial check. Maintain this record for future reference or troubleshooting. Following these preliminary steps ensures that you address potential issues early in the testing process.
Performance Testing
Engage in performance testing after the initial check. Use a multimeter to measure voltage output from the solar panels. Connect the multimeter, following the positive and negative terminal guidelines. Record the readings; compare them to the manufacturer’s specifications.
Monitor the inverter’s performance for a full day, ideally during peak sunlight hours. Take note of any fluctuations in output. Testing across different times and weather conditions improves accuracy.
Evaluate the energy production within a specific time frame. Track energy generation over several days, noting variations caused by cloud cover or seasonal changes. Regular analysis helps gauge system efficiency.
Consider using performance monitoring software, if available. This software can automate data collection, providing insights into long-term performance trends. Regular performance testing ensures the system operates optimally, maximizing your investment in solar energy.
Maintenance Tips for Solar Panel Systems
Maintaining solar panel systems ensures optimal performance and longevity. Implementing simple practices can greatly enhance energy production and efficiency.
Regular Cleaning
Regular cleaning of solar panels prevents dirt buildup and grime. Dirt can reduce sunlight absorption which affects performance. Aim to clean panels every 6 months or more often in dusty areas. Use a soft brush or sponge with mild soap and water to avoid scratches. Rinse panels thoroughly afterward to remove any residue.
Check for nearby debris like leaves or branches that might block sunlight. Trim any overhanging plants to maintain clear exposure to the sun. Making cleaning a routine task helps ensure maximum energy output.
If you experience frequent rain, natural cleaning occurs. However, heavy rainfall may not wash away all debris, making manual cleaning necessary. Clean during early morning or late afternoon to avoid heat stress that can lead to cracking.
Consider professional cleaning services for hard-to-reach panels or larger installations. These experts use specialized equipment to clean panels safely and effectively.
Inspecting for Damage
Inspecting solar panels for damage plays a crucial role in maintenance. Regular inspections help identify issues such as cracks, chips, or loose connections. Schedule inspections at least once a year or after severe weather events.
Begin the inspection visually. Look for any physical damage on the panel surface. Check the mounts and brackets to ensure they remain secured. Inspect wiring for fraying or loose connections, which can lead to performance issues.
Additionally, look for signs of moisture or condensation. Presence of moisture may indicate internal damage or concerns that require immediate attention. Address any issues promptly to avoid further complications.
If you find significant damage during inspections, consult a professional for repairs. Quick intervention can prevent further loss of energy production and maintain safety.
Monitoring System Performance
Monitoring system performance regularly contributes to the health of solar panel systems. Use monitoring software or apps to track energy production in real time. These tools provide insights into efficiency and system status.
Set performance benchmarks based on system capacity and historical data. Compare current output to expected output to identify declines in performance. If output drops significantly, investigate possible causes such as shading, damage, or system malfunctions.
Look for alerts or notifications from monitoring systems that signal potential issues. Reacting quickly to alerts can save on repair costs and maximize energy efficiency.
Consider scheduling a professional assessment for any persistent performance issues. Experts can conduct detailed diagnostics to ensure all components function correctly. Regular performance monitoring allows you to maintain efficiency and maximize energy generation.
Conclusion
Embracing solar panel installation is a smart move for both your wallet and the planet. By following the outlined steps and understanding the nuances of setup and maintenance, you can maximize your energy savings and contribute to a greener future.
Don’t overlook the importance of planning and selecting the right components for your specific needs. Regular testing and maintenance will ensure your system operates efficiently for years to come.
As you take this significant step toward energy independence, you’ll not only enjoy financial benefits but also increase your property’s value and reduce your carbon footprint. Start your solar journey today and experience the rewards of harnessing renewable energy.
Frequently Asked Questions
What are the benefits of solar panel installation?
Installing solar panels can significantly reduce energy costs by 50-90%. Additionally, they decrease reliance on fossil fuels, leading to lower greenhouse gas emissions. Solar panels also increase property value, qualify for government incentives, and require minimal maintenance.
How do I assess my energy needs before installing solar panels?
To evaluate your energy needs, review your recent utility bills to determine your average monthly energy consumption. This will help you estimate the number of solar panels required for your home.
What factors should I consider for panel placement?
When planning panel placement, consider your roof’s condition, orientation, angle, and the amount of sunlight exposure. Ensure that your roof is structurally sound and free from obstructions that might block sunlight.
What types of solar panels are available?
The three main types of solar panels are monocrystalline, polycrystalline, and thin-film. Each type varies in efficiency, cost, and installation requirements, so choose one based on your energy needs and budget.
Is it necessary to obtain permits for solar panel installation?
Yes, obtaining necessary permits and approvals from local authorities is essential before installing solar panels. This ensures compliance with safety regulations and local building codes.
What tools do I need for solar panel installation?
Essential tools include basic hand tools like screwdrivers, pliers, and wrenches, as well as power tools like drills and circular saws. Safety equipment, such as gloves and safety glasses, is also crucial for a safe installation.
