


Are you considering making the switch to solar energy? Installing a solar system can be one of the smartest investments you make for your home and the environment. As energy costs rise and concerns about climate change grow, harnessing the power of the sun not only reduces your electricity bills but also contributes to a sustainable future.
Understanding the solar installation process is key to maximizing your investment. From selecting the right equipment to navigating permits and incentives, each step plays a crucial role in ensuring your system operates efficiently. Whether you’re a first-time buyer or looking to upgrade, knowing what to expect can make the journey smoother and more rewarding. Let’s dive into the essentials of solar system installation and discover how you can benefit from this clean energy solution.
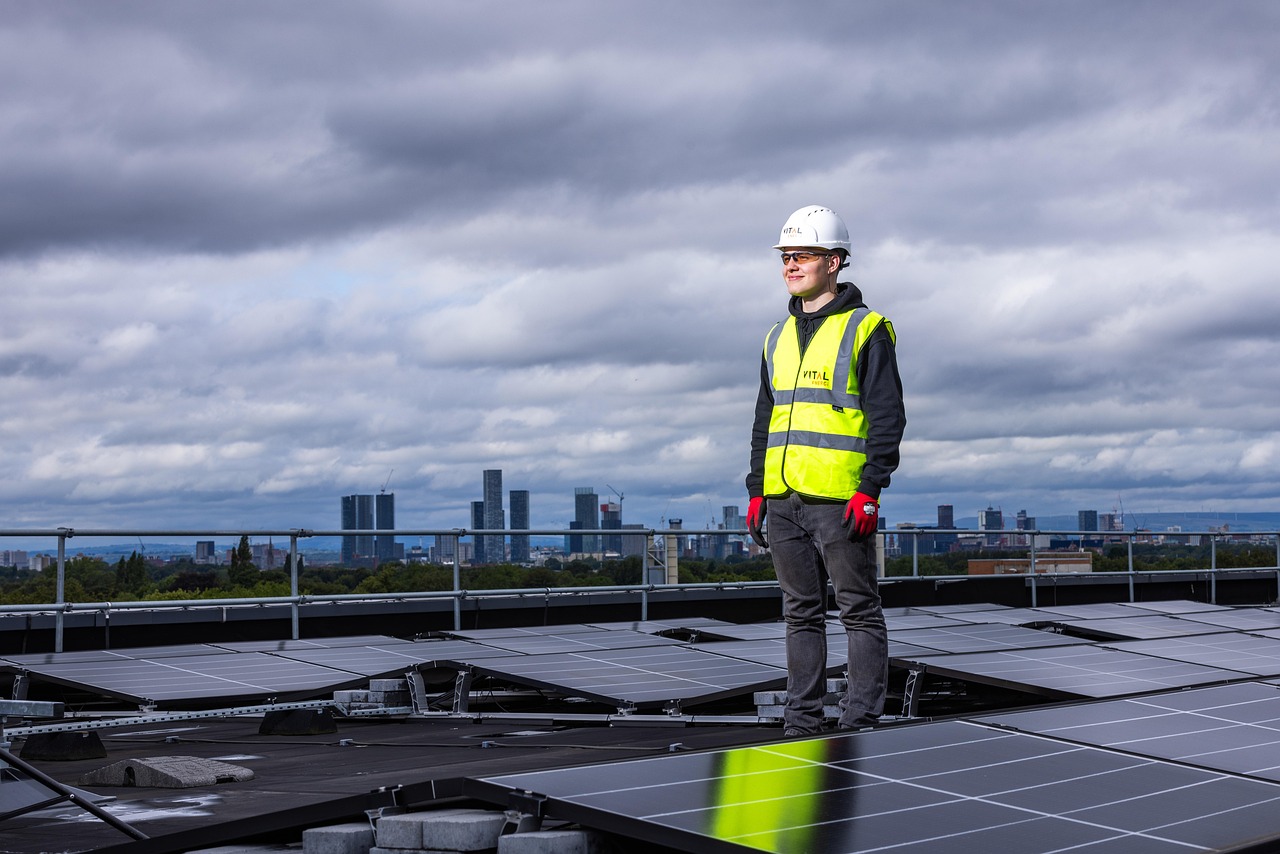
Solar System Installation
Solar system installation involves several key steps that guide you from assessment to activation. Each step plays a crucial role in ensuring the system operates effectively and efficiently.
Step 1: Site Assessment
Conduct a site assessment to evaluate your roof’s suitability for solar panels. Check for space availability and sunlight exposure. Ensure trees or buildings do not cast shadows on the roof, which can reduce energy production.
Step 2: Choose Solar Equipment
Select solar equipment based on your energy needs. This includes solar panels, inverters, and battery storage. Research available brands and compare efficiency ratings. Focus on warranties and customer reviews to find reliable options that fit your budget.
Step 3: Obtain Permits
Secure all necessary permits for installation. Contact your local building department for specific requirements. These permits often include electrical and structural permits. Ensure compliance with local building codes to avoid potential fines.
Step 4: Structure Preparation
Prepare your roof structure for the installation. Perform any needed repairs or reinforcements to support the panels. Ensure the surface is clean and ready for mounting.
Step 5: Installation Process
Begin the installation process once everything is ready. Mount the solar panels in accordance with the manufacturer’s guidelines. Install the inverter and necessary wiring to connect the system to your home’s electrical system. Ensure proper grounding for safety.
Step 6: Inspection
Schedule an inspection with your local authority once the installation completes. An inspector will confirm that all work meets regulatory standards. Address any required updates or modifications promptly.
Step 7: System Activation
Activate your solar system after passing the inspection. Connect to your local utility grid if applicable. Monitor your solar energy production to ensure everything operates as expected.
Completing these steps results in the successful installation of your solar system, allowing you to enjoy the benefits of renewable energy.
Understanding Solar Energy
Solar energy refers to the energy derived from sunlight. This energy can be converted into electricity or heat. Solar panels, which capture sunlight, serve as the primary technology for this conversion. Understanding solar energy is essential for anyone considering a transition to renewable energy solutions.
What Is Solar Energy?
Solar energy is energy generated from the sun’s rays. This energy can be utilized in various ways. Photovoltaic (PV) systems convert sunlight directly into electricity. Solar thermal systems capture heat for direct use, such as heating water or spaces. Both methods utilize the abundant energy provided by the sun. Millions of homeowners and businesses have turned to solar energy to reduce reliance on fossil fuels and decrease energy bills. The increasing efficiency of solar technologies continues to make solar energy a viable option for energy needs.
Benefits of Solar Energy
Solar energy provides several advantages. Cost savings rank high among the benefits. Homeowners using solar panels often experience lower electricity bills. Long-term savings on energy costs add up significantly over time. Environmental benefits also play a critical role. Solar energy reduces greenhouse gas emissions, contributing to a cleaner atmosphere. Energy independence stands as another key benefit. By generating your own power, reliance on outside sources decreases. Many incentives and tax credits exist for solar installations, making the investment more affordable. Overall, switching to solar energy presents numerous practical and economic advantages.
Preparing for Installation
To get ready for solar installation, you should determine your energy requirements and select the most suitable system for your needs. This will help to guarantee that the solar setup performs as expected and meets your satisfaction.
Evaluating Your Energy Needs
Start by examining your electricity bill from the past year to get an average idea of how much energy you usually consume every month (in kWh). Make sure you note down the times when you consume more energy than usual.
Consider multiplying your average monthly consumption by 1.2. This will address possible system inefficiencies. As such, you will be on the right path as regards buying a solar setup that meets or exceeds your energy requirements.
You may also need to think about getting a home energy audit done. This is an exhaustive examination of how energy is used within the home. Such audits reveal where efficiency can be improved, resulting in a reduced energy load, thus allowing for a smaller-sized solar system to be purchased. Many utility companies provide services or incentives for performing such audits.
Choosing the Right Solar System
It is crucial that you select the correct type of solar systems based on your energy requirements, available rooftop space as well as budget constraints. First decide on whether to go with photovoltaic (PV) systems which turn sunlight into electricity directly or solar thermal systems that collect heat energy from the sun.
Find good solar panels, inverters, and batteries. Check how efficient they are. Find the panels that give the most energy for little space.
String inverters link up some panels. Microinverters check each panel alone. These control how well the system works if some areas are in the shade.
Look for grants, tax breaks, and low-cost loans from the government for solar power. These make solar cheaper in the long run.
Materials and Tools Required
Gathering the right materials and tools is crucial for an effective solar system installation. Ensuring you have everything on hand before starting speeds up the process and enhances safety.
Essential Materials
Solar panels convert sunlight into electricity. Choose efficient models based on your energy needs. Inverters change direct current from the panels into alternating current for home use. Select inverters that match the system size. Mounting racks secure panels on your roof or ground, ensuring stability and optimal positioning. Wiring connects all components. Use high-quality wires to minimize energy loss. Batteries store excess energy for use during low sunlight periods. Choose batteries based on your storage requirements. Charge controllers regulate battery charging and discharging, preventing overcharging. Safety equipment such as circuit breakers and fuses ensures protection from electrical surges. Additionally, sealants and adhesives help secure components and prevent leaks, especially on roofs.
Necessary Tools
Safety harnesses allow safe access to elevated locations. Ensure you wear these during installation. Ladders provide access to roofs; select stable options for reliability. Drills with various bits enable attachment of mounts and components. Use screwdrivers for securing connections and brackets. Wire strippers facilitate clean wire connections, which enhance performance. Multimeters measure voltage and current for troubleshooting. A level ensures panels are mounted accurately for maximum efficiency. Measuring tape helps you determine space and placement. Utility knives assist in trimming and cutting materials securely. Gloves protect your hands during installation. Gather these tools to create a safe and efficient working environment.
Installation Process
The installation process for solar systems consists of several critical steps. Each step lays the foundation for a successful solar energy setup, ensuring efficiency and compliance with regulations.
Step 1: Site Assessment and Preparation
Conduct a thorough site assessment to determine the suitability of your roof for solar panel installation. Inspect factors such as roof orientation, shading from trees or buildings, and structural integrity. Measure the available roof space while ensuring it can accommodate the chosen solar panel system. Analyze sunlight exposure throughout the year to understand energy production potential.
Prepare the roof by addressing any necessary repairs. Ensure all debris and obstacles are cleared from the installation area. Confirm that the roof’s tilt and angle optimize sunlight exposure. Use tools like a measuring tape and level to ensure accurate measurements. Review local building codes to confirm that all preparations align with requirements.
Step 2: Mounting the Solar Panels
Begin the mounting process by selecting appropriate mounting hardware based on your roof type. Use either roof-mounted or ground-mounted systems, depending on your installation preferences. Assemble the mounting brackets and secure them to the roof using proper tools, ensuring alignment and stability.
Position the solar panels on the mounting brackets, making sure they face the sun for optimal energy absorption. Fasten each panel securely to prevent movement caused by wind or weather conditions. Ensure that the panels are level and spaced correctly to allow for maintenance and cleaning. Establish a clear path for wiring while keeping the installation neat and organized.
Step 3: Electrical Wiring
Install the electrical wiring following safety guidelines and manufacturers’ instructions. Begin by connecting the solar panels using appropriate wiring that can handle the system’s voltage and current. Use connectors to secure the connections, ensuring they are tight and waterproof.
Connect the wiring to the inverter, which converts the direct current (DC) produced by the solar panels into alternating current (AC) that powers your home. Install the inverter in a shaded location to optimize its performance. Additionally, connect the inverter to the electrical panel in your home, following local code requirements. Test all connections to prevent any potential electrical issues.
Step 4: Connecting to the Grid
After completing the electrical wiring, prepare to connect your solar system to the grid. Check local utility regulations for interconnection requirements. Prepare the necessary documentation to submit for grid connection approval.
Schedule a utility inspection to ensure your system meets all safety and performance standards. Upon approval, connect your solar system to the grid following the utility’s guidelines. Install a net meter that tracks energy production and usage. This enables you to receive credit for excess energy sent back to the grid. Confirm all connections are secure, and perform a final check of the entire system before activation.
Tips for a Successful Installation
Ensuring Proper Orientation and Angle
Proper orientation and angle of solar panels maximize sun exposure and energy production. Aim panels toward true south for optimal sunlight capture throughout the day. Adjust the angle based on your latitude; as a rule of thumb, tilt panels to your latitude plus 15 degrees. For instance, if your location is at 30 degrees, the ideal tilt is 45 degrees. This angle captures sunlight during the winter months when the sun is lower in the sky. Use tools like solar pathfinders or online calculators to analyze shading from nearby trees or structures. Adjust the installation site, if necessary, to avoid shadows that reduce efficiency. Consider local weather patterns that affect sun exposure. Confirm that the installation complies with local regulations and guidelines for safety. Overall, orientation and angle directly impact long-term energy production.
Timing Your Installation
Selecting the right time for installation influences both efficiency and cost. Spring and fall serve as optimal seasons due to milder weather conditions, enhancing both safety and productivity. Plan installations during days with minimal chance of rain or extreme wind. Prioritize scheduling installations outside peak electricity usage times, like summer afternoons, to minimize contractor costs. Analyze local utility schedules for best rates and incentives available with solar installations. Local building departments may experience slower processing times during winter months, affecting permit approval. Submissions for permits may take anywhere between one week to several weeks, so factor this time into your overall schedule. Ensure that all materials are prepared in advance and the site is ready for the crew. This careful timing improves overall satisfaction with the installation process.
Maintenance of Your Solar System
Proper maintenance ensures that your solar energy system operates at peak efficiency and longevity. Regular upkeep minimizes potential issues, maximizes energy production, and prolongs the lifespan of your solar panels and equipment.
Regular Cleaning and Inspections
Clean solar panels maintain optimal performance. Dust, debris, and bird droppings can reduce sunlight absorption. Rain often provides a natural cleanse; however, manual cleaning may be necessary in dry or dusty areas. Use a soft brush or sponge and soapy water for gentle cleaning. Avoid harsh chemicals to prevent panel damage. Aim for cleaning at least twice a year or more often if you reside in a particularly dirty area.
Schedule inspections annually. During inspections, check for physical damage, loose wiring, and vegetation shading. Look for frayed or damaged cables and inspect the inverter functionality. Consider hiring professional solar technicians for in-depth checks. These experts can better detect hidden issues and ensure compliance with safety regulations. Taking proactive steps in cleaning and inspections can optimize energy production and avoid costly repairs.
Monitoring System Performance
Monitor the performance of your solar system frequently. Most inverters come equipped with monitoring systems that provide real-time data on energy production. Review this data to ensure your system operates within expected parameters. Investigate sudden drops in production, which could indicate issues like shading, dirt accumulation, or electrical problems.
Use mobile apps or web portals associated with your inverter for easy access to performance metrics. Consider tracking long-term performance trends to identify gradual declines in energy production. If energy output consistently falls below expectations, contact a solar technician for a thorough assessment. Regular monitoring leads to quicker responses to potential problems, preserving efficiency and maximizing your investment in solar energy.
Conclusion
Transitioning to solar energy is a powerful step toward sustainability and savings. By understanding the installation process and maintaining your system, you can maximize your investment and enjoy the numerous benefits of clean energy.
Proper planning and equipment selection are crucial to ensure your solar system meets your energy needs. Regular maintenance and monitoring will keep your system running efficiently for years to come.
As you embark on this journey, remember the importance of staying informed about incentives and advancements in solar technology. Embracing solar energy not only benefits your wallet but also contributes to a healthier planet for future generations.
Frequently Asked Questions
What are the benefits of switching to solar energy?
Switching to solar energy offers several benefits, including reduced electricity bills, lower greenhouse gas emissions, and increased energy independence. Solar energy is a renewable resource, making it a sustainable choice for homeowners. Additionally, various incentives and tax credits can make installations more affordable, enhancing the overall return on investment.
How does the solar installation process work?
The solar installation process begins with a site assessment to evaluate your roof’s suitability for solar panels. Once assessed, you choose the appropriate solar equipment, such as panels and inverters. After securing permits, the installation occurs, followed by an inspection to ensure compliance with regulations. Finally, the system is activated, and you’ll start monitoring energy production.
What types of solar systems are available?
There are two primary types of solar systems: photovoltaic (PV) systems, which convert sunlight directly into electricity, and solar thermal systems, which capture heat for direct use. PV systems are commonly used for residential energy needs, while solar thermal systems are often used for heating applications.
How do I determine my energy needs for solar installation?
To determine your energy needs, review past electricity bills and consider upcoming energy demands. Calculate your total energy requirements to ensure the solar system can meet or exceed these needs. Conducting a home energy audit can provide a detailed assessment of your energy usage and help size your solar system appropriately.
What materials and tools are needed for solar installation?
Necessary materials for solar installation include solar panels, inverters, mounting racks, wiring, batteries, and safety equipment. Essential tools include safety harnesses, ladders, drills, screwdrivers, wire strippers, multimeters, and measuring tools to ensure a safe and efficient working environment during installation.
How can I ensure my solar panels are optimally oriented?
To maximize sun exposure and energy production, orient solar panels toward true south, adjusting the angle based on your latitude. It’s essential to install panels at an angle that allows for optimal sunlight capture throughout the year, often aiming for a tilt similar to your latitude.
What maintenance is required for solar energy systems?
Regular maintenance is crucial to keep solar energy systems operating efficiently. Clean solar panels at least twice a year and schedule annual inspections to check for damage and functionality. Monitoring system performance through your inverter’s real-time data helps address any issues promptly and optimize efficiency.
What common issues might arise after solar installation?
Common post-installation issues include low sunlight conditions affecting energy production and electrical connection problems. Ensuring proper panel orientation, regular monitoring, and maintenance checks can help address these issues. Documentation of system performance can also aid in optimizing efficiency and troubleshooting effectively.
When is the best time to install solar panels?
The optimal seasons for solar installation are typically spring and fall, as these periods offer milder weather conditions and potentially lower contractor costs. Installing during these times can improve the overall installation experience and efficiency.
Are there financing options available for solar installations?
Yes, various financing options are available for solar installations, including loans, leasing programs, and power purchase agreements (PPAs). Exploring these options can help make solar installations more affordable and improve your return on investment by lowering upfront costs.
